Integrating Cisco ISE (3.0) with Active Directory
Our Cisco ISE deployment can be integrated with Microsoft’s Active Directory (AD). As our ISE platform is used to authenticate and authorize devices, the directory can be used an external identity source.
In this lesson, we’ll take a look at how we can integrate Cisco ISE with Active Directory.
Overview
The Cisco ISE platform identifies users and devices authenticating to the network. One method of authenticating the clients is using an existing Active Directory infrastructure.
Cisco ISE can identify an abundance of criteria. This includes:
Active Directory Integration Configuration
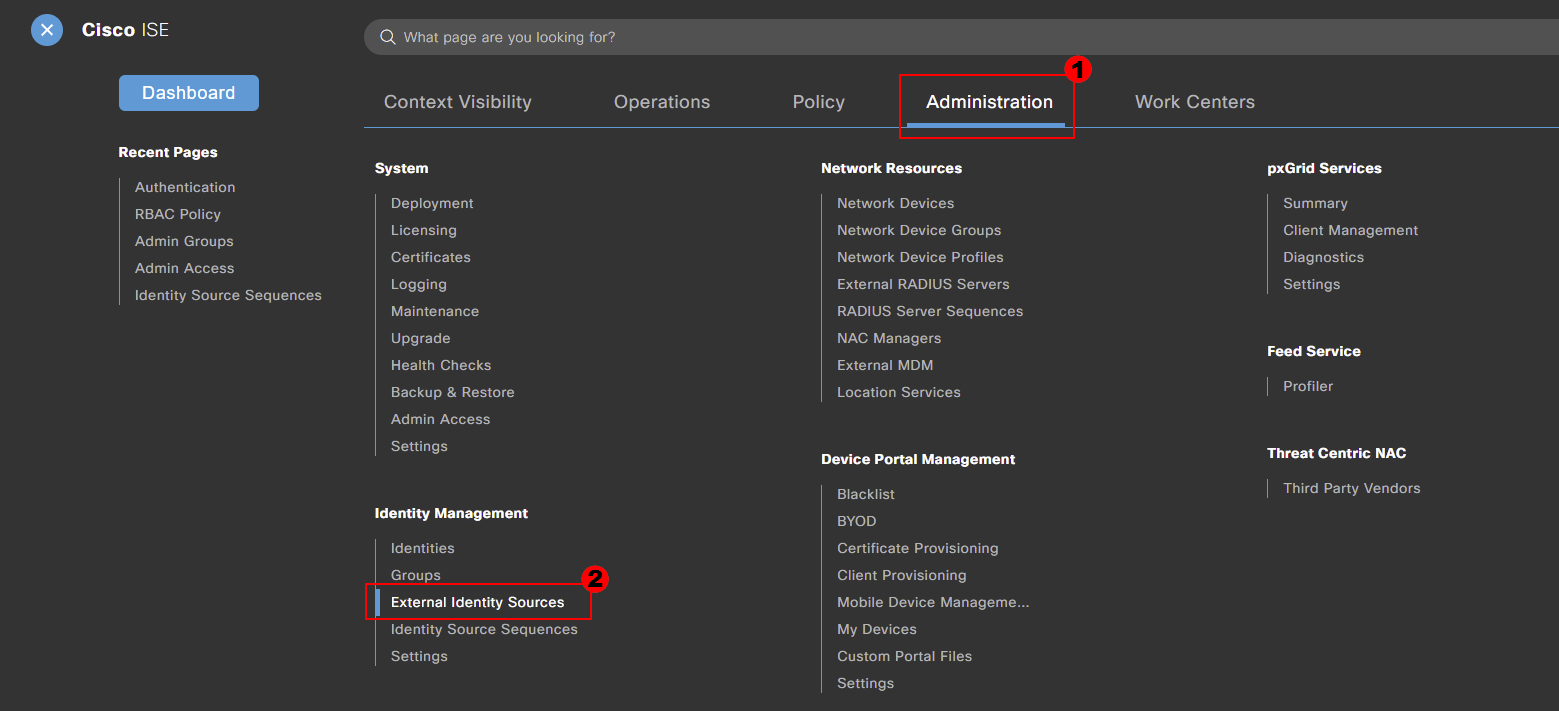
To start our configuration we’ll navigate to our external identity configuration. This can be achieved by navigating to:
Menu > Administration > External Identity Sources
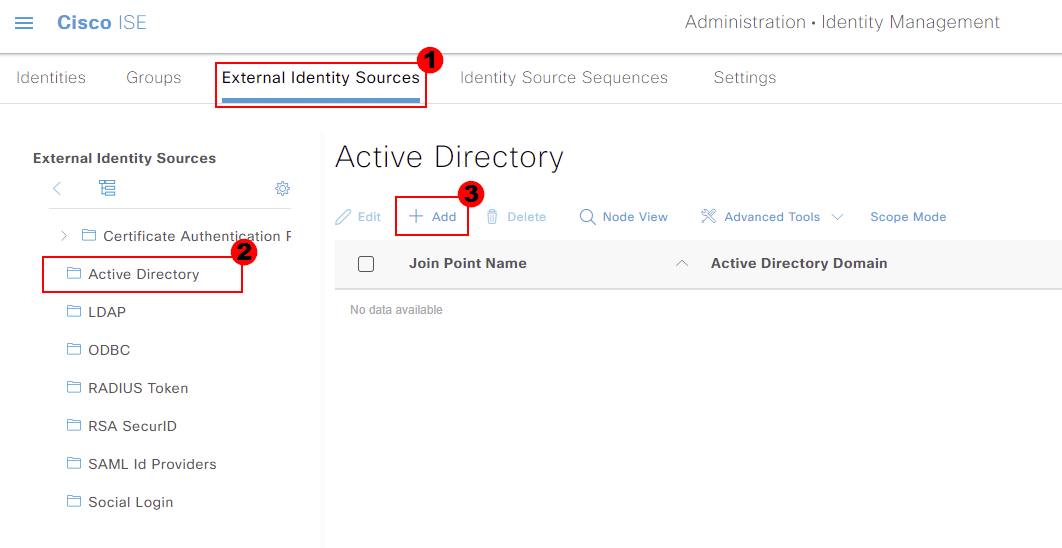
Within our external identity source configuration, select Active Directory. We can then press Add to add our Active Directory configuration.
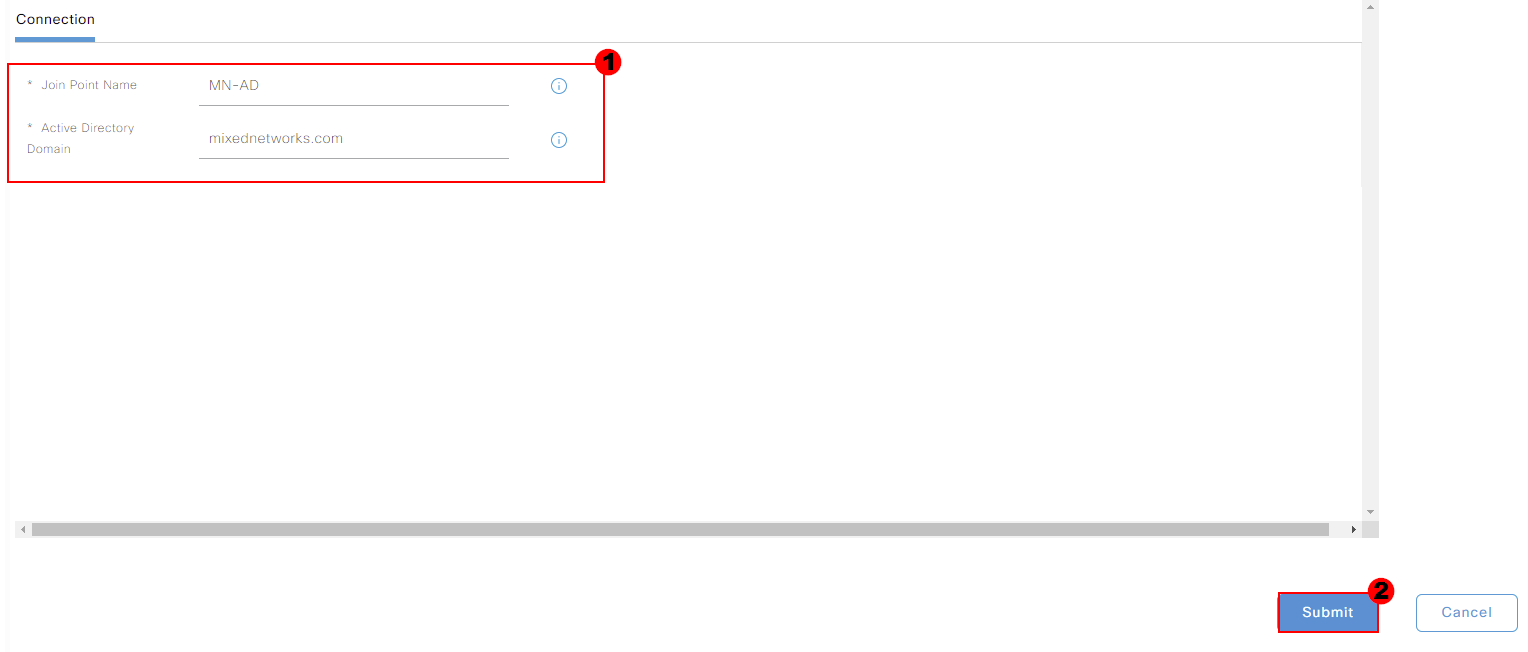
Next, we’ll give our Active Directory a Join Point Name. This is a friendly name used by Cisco to reference the directory. I’ll call mine MN-AD.
The next step is to provide your Active Directory Domain. My domain is mixednetworks.com. Once we’ve finished, we’ll press Save.
You’ll be prompted with the following pop-up. If you have multiple nodes within your Cisco ISE deployment, you can select Yes to join them all to Active Directory.

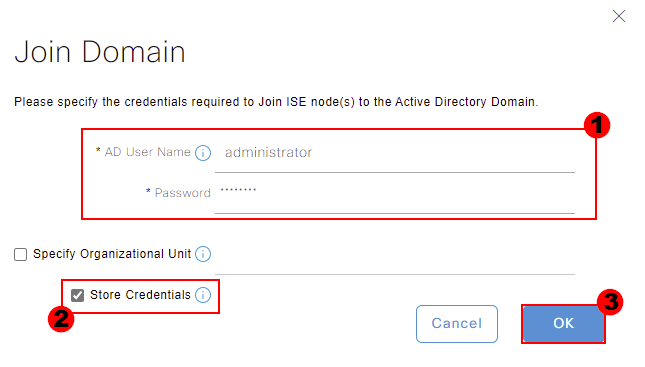
Our ISE nodes need to be added to Active Directory as computer objects. In order to achieve this, we need to provide some credentials. I’ll use my administrator account.
If required, you can use Specify Organizational Unit to instruct ISE on where to store the computer objects.
Finally, I’ll select Store Credentials. This allows any other ISE nodes to use the same credentials. Once done, I’ll press OK.
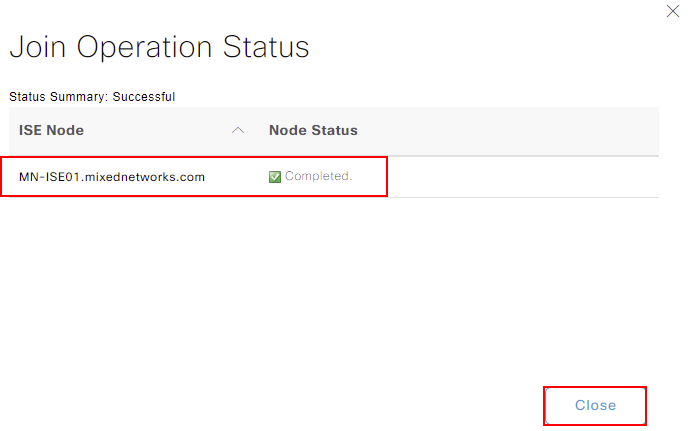
Our ISE nodes will then go away and run a number of tasks. This includes connecting to our domain controllers, creating the computer objects etc.
If any errors occur, these will be flagged, allowing you to correct them. Our example has been completed successfully, so I’ll close this window.
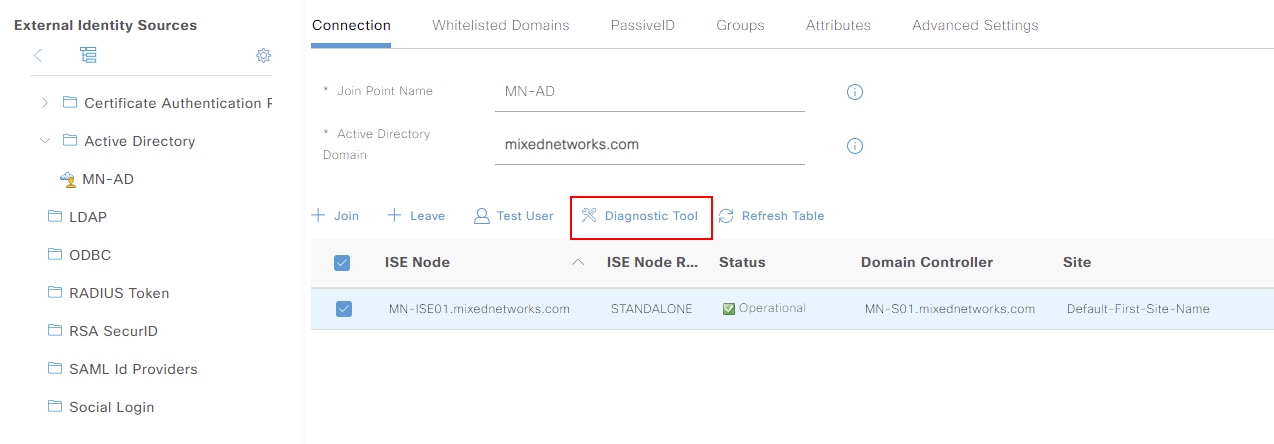
Finally, you should see your node showing as Connected. Along with this, it will show the domain controller the node is associated with. In our example, our node is associated to MN-S01.

At this point your Cisco ISE deployment is associated with Active Directory and ready to be used.
Active Directory Diagnostics Tool
Now that Cisco ISE is integrated with Active Directory, let’s take a look at the available diagnostic tool. This can be extremely useful to ensure all required services are working as expected. This includes:
We can use the tool by selecting our ISE node associated to active directory. We can then select Diagnostic Tool.
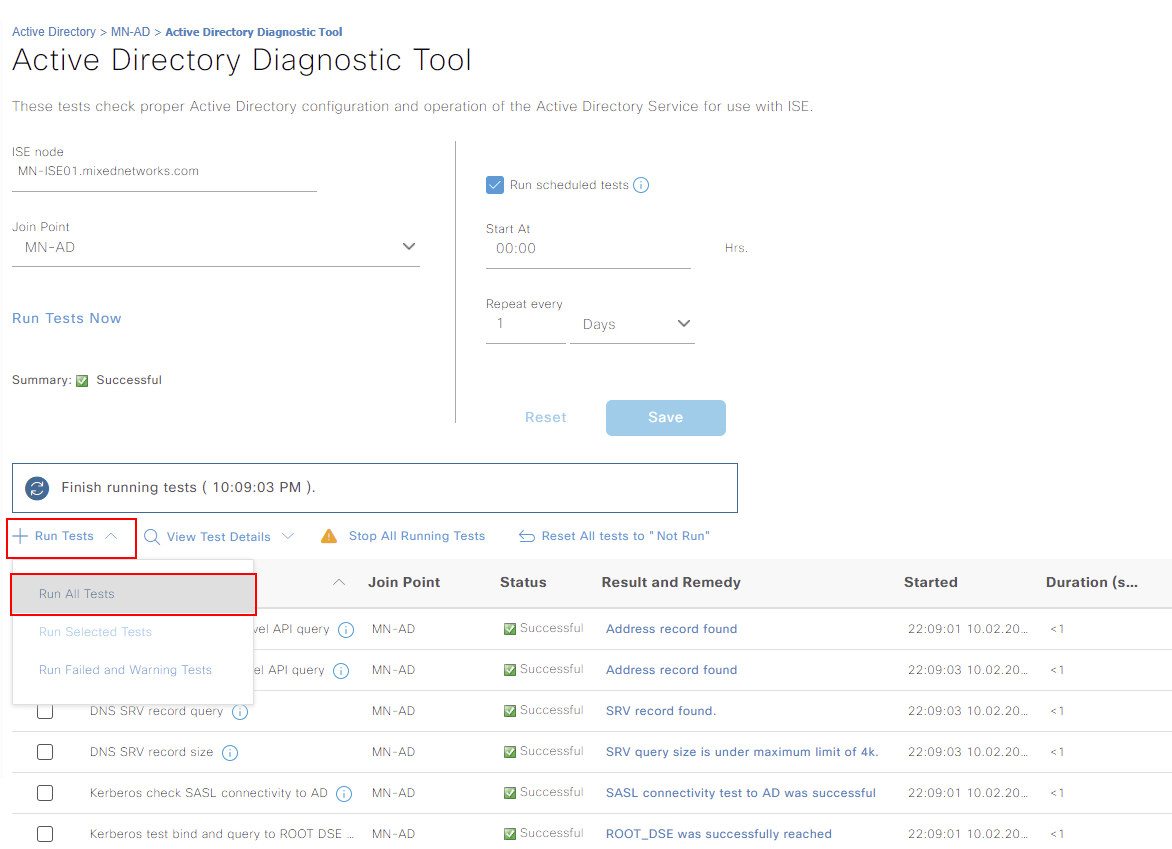
Once the tool loads, we have the option to either schedule the check or run one on demand. We’ll run an ad-hoc test by selecting Run Tests. From here, I’ll select Run All Tests.
You can see under this, a list of the tests that will be performed. In our example, they’ve all come back successful.
Verify User Authentication
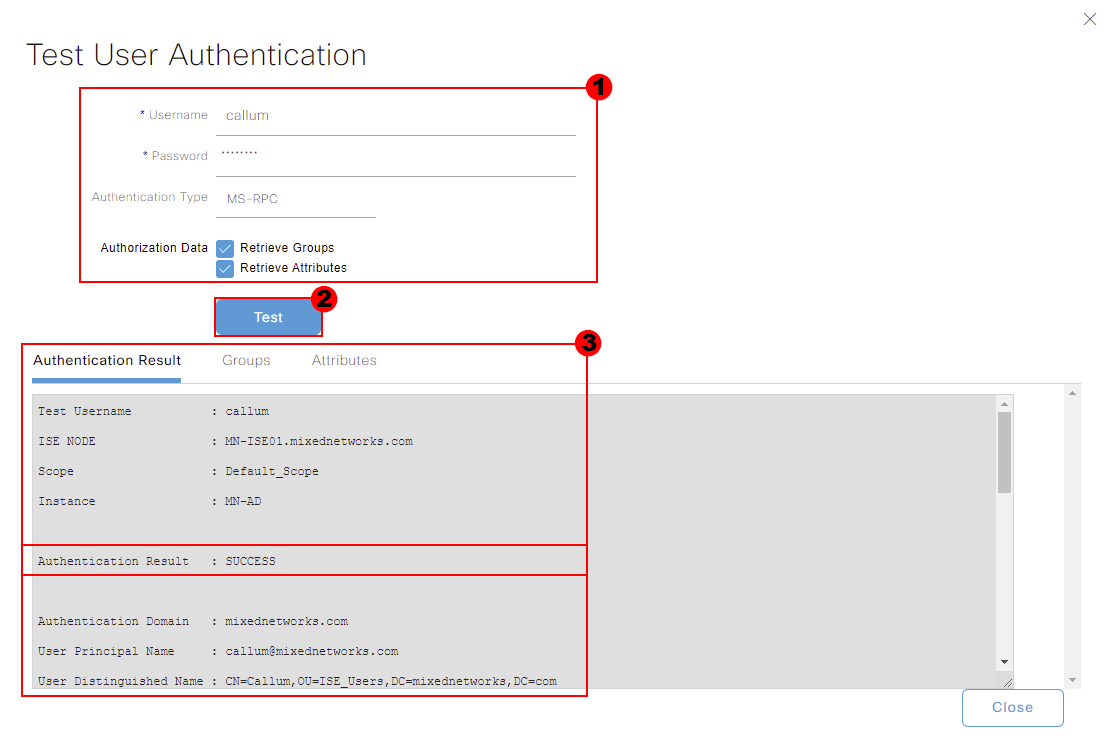
The final testing functionality that we’ll look at is User Authentication. Using this tool, ISE will submit a request to our Active Directory to authenticate user credentials. This can be used to ensure ISE can communicate to our
Active Directory correctly.
We can use the tool by selecting our ISE node associated to active directory. We can then select Test User .

From here, we enter credentials for an user within our domain. I’ll use an account called Callum and use MS-RPC for the authentication. We can then press Test to start.
Our result will then be presented below. In this instance, the authentication was a success.
