Setting up Ansible
In this lesson we’re going to be setting up our Ansible files ready for our upcoming GNS3 Ansible lab.
Overview
Once Ansible has been installed, two files are automatically installed:
ansible.cfg
The ansible.cfg file contains the global configuration for Ansible. Some of parameters that can be configured within the file include:
hosts
In order for Ansible to operate, we need to provide it with a list of devices to manage. This is achieved by using the hosts file, also known as an inventory.
Devices in our host file can be configured using either an IP address of FQDN.
Topology

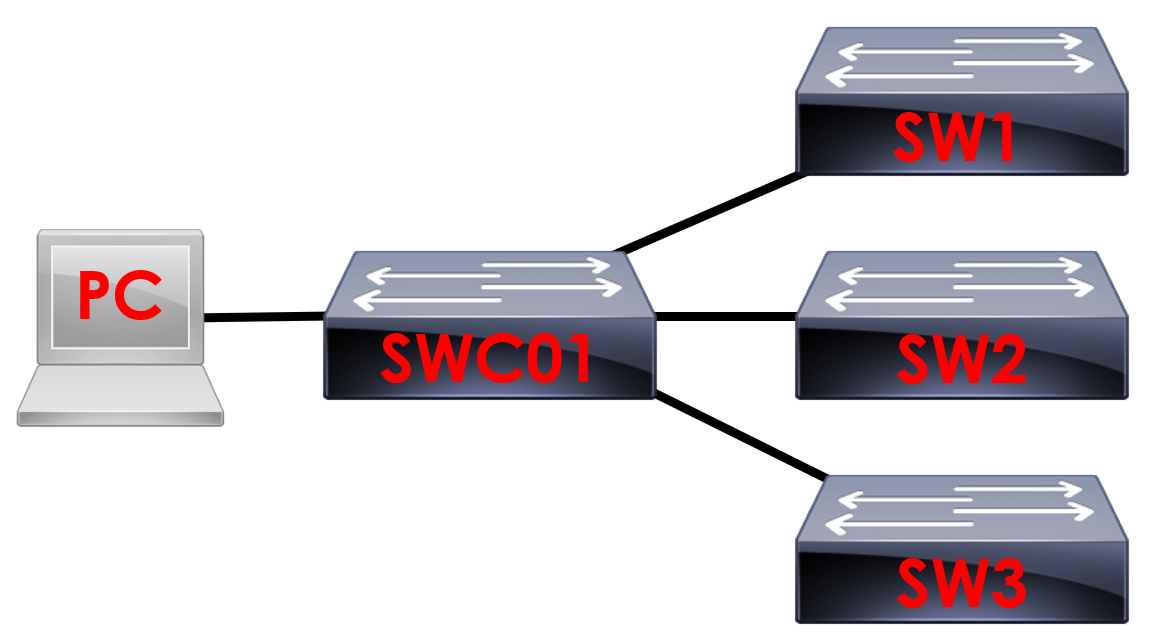
We’ll be using the example above to help us understand Ansible.
We’ve got 3 access switches (SW1, SW2 and SW3) connected to our core switch (SWC01). From here we then have our PC connected to SWC01 running Ansible.
Hosts Configuration
We have the ability to create multiple hosts files and reference them using either the ad-hoc commands, or using a Playbook. By default, the file contains a template of how to format the file, however all the lines are commented out (ignored).
root@NetworkAutomation-1:# cd /etc/ansible
root@NetworkAutomation-1:/etc/ansible#
The hosts file is located in /etc/ansible. We can navigate to the folder using the cd /etc/ansible command.
root@NetworkAutomation-1:/etc/ansible# ls
ansible.cfg
hosts
We can view the files in the folder using the ls command. Here we can see the default hosts file.
Personally, I like to create a separate hosts file for each project I’m working on to make it easier to read.
To avoid confusion, lets create another folder for our Ansible work.
root@NetworkAutomation-1:/etc/ansible# cd ..
root@NetworkAutomation-1:/etc# mkdir CiscoAnsible
We’ll drop back a folder level using cd .. and then create a folder using mkdir CiscoAnsible command.
root@NetworkAutomation-1:/etc# cd CiscoAnsible
root@NetworkAutomation-1:/etc/CiscoAnsible#
Next, lets navigate to our CiscoAnsible folder using the cd command.
root@NetworkAutomation-1:/etc# nano hosts
To create our new hosts file we’ll use the nano command followed by the name of the file. We can call the hosts file whatever we like, as long as we reference it in ansible.cfg. In this example, we’ll keep it simple and name it hosts .
# Ansible Hosts for Basic MixedNetworks Lab
[CORE]
SWC01 ansible_host=192.168.10.254
[ACCESS]
SW1 ansible_host=192.168.10.251
SW2 ansible_host=192.168.10.252
SW3 ansible_host=192.168.10.253
[ALL:children]
CORE
ACCESS
We now need to add the devices from our topology to the hosts file to be able to manage them via Ansible.
We’ll start from the top and work our way down.
# Ansible Hosts for Basic MixedNetworks Lab
As we go more in-depth with Ansible, you’ll notice that it’s easier to create a hosts file for each project. Due to this, I like to put a comment at the top to describe its purpose.
Lines that start with
# are used for commenting and ignored by Ansible.
[CORE] and [ACCESS]
We’ve grouped our network devices into three groups; CORE, ACCESS and ALL:children. When we reference these groups, they’re case sensitive. Because of this, I like to capitalise them to make it easier.
I’ve split the devices into groups to allow us to run Ansible commands against specific devices.
Let’s say we want to run commands specifically against our access switches, we can specifically reference the
ACCESS group to achieve this.
SWC01 ansible_host=192.168.10.10
Each of our groups contains the specific network devices. We first of all define the friendly name for the device, in this example SWC01
.
This name appears when we run our Ansible Playbooks and makes it easier to understand which devices have been amended by Ansible.
We then need to specify an IP address in which Ansible can reach SWC01. This is achieved with ansible_host= followed by the IP address of the device.
[ALL:CHILDREN]
To make our hosts file cleaner and to make it easier to manage our devices, we can use the children function. This allows us to group our existing groups as children within a group.
In this example, we’ve listed our CORE and ACCESS group as children within the group named ALL. What this will allow us to do is address all of the devices in our hosts file at once.
Ansible.cfg Configuration
We have the ability to adjust settings Ansible uses when controlling devices using the ansible.cfg file. By default, the file contains a list stock configuration.
We can view the default file as follows:
root@NetworkAutomation-1:# cd /etc/ansible
root@NetworkAutomation-1:/etc/ansible#
The Ansible configuration file is located in /etc/ansible. We can navigate to the folder using the cd /etc/ansible command.
root@NetworkAutomation-1:/etc/ansible# ls
ansible.cfg hosts
We can view the files in the folder using the ls command. Here we can see the default ansible.cf g file.
root@NetworkAutomation-1:/etc/ansible# cat ansible.cfg
In order to view the default ansible.cfg file, we can use the cat command.
[default]
#
inventory = /etc/ansible/hosts
#library = /usr/share/my_modules/
You’ll notice that the file provides a whole list of parameters that can be configured.
By default, all configuration is disabled. This is due to each line of configuration starting with a #
.
Lines starting with # are used for commenting code. Think of this like you’d use a description within Cisco. The lines starting with # are ignored by Ansible so are used for commenting/describing code.
I recommend to create a new Ansible configuration file to avoid the clutter that comes with the default file.
root@NetworkAutomation-1:/etc/ansible$cd /etc/CiscoAnsible
root@NetworkAutomation-1:/etc/CiscoAnsible#
To achieve this, we’ll navigate to the folder we created earlier in the lesson. To achieve this, we’ll use the cd command, followed by the folder we want to navigate to.
root@NetworkAutomation-1:/etc/CiscoAnsible#nano ansible.cfg
To create our new Ansible configuration, file we’ll use the nano command followed by ansible.cfg.
[default]
inventory = /etc/CiscoAnsible/hosts
In order to keep things simple, to start with we’ll just specify our hosts file as shown below.
We can exit and save the file once finished using CTRL and X
.